Adventure Tutorial

Rob Burrito

New member
Hey just running through the adventure tutorial, wanted to say thanks for adding the timestamps, and start a thread for things found in the Adv tutorial. great feature for figuring out where you went wrong! would have helped in beta haha.
 

Rob Burrito

New member
things going well up to 1:15:00 of the way through the tutorial. must say it's fun to have music so early, it really adds to the experience using the tutorial and moving a character on screen for the first time. the NPC functionality is great!

two things came up for me so far, any clarification or insight would be appreciated.

first is at 0:06:30, when assigning the emulator. i was trying to get my bearing on general project organization in the new program. do we need to copy and make a new root folder for each new game (like in the beta) or does the data all load with just the MST save file? was slightly confused since the graphic assets for multiple projects can all share the same graphic assets folder. in the video it seems theres a new root folder for each project. was just wondering if that's protocol for each new project to be a different complete NESmaker file. may have missed it, but didn't see this specified in the getting started 1 or this tutorial.


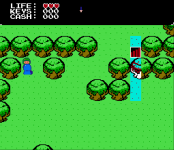
second was at 01:14:00 when the 'first' text box leaves, depending on your text box size apparently, it changes some of the edge grassland tiles to the 4th palette of the grassland palette group. watched through it a second time checking each point, and the issue persisted. (pic below of after the text box disappears) found it was related to the text box size, as by changing just the text box size in the HUD screen i was able to get the issue to stop, or repeat in various forms at different size variables. i haven't been able to pinpoint quite what causes it yet, if i get any further with rooting it i'll post. but in case someone else runs into this, just change your text box size and it will likely go away.

text box swap pal 4.PNG
 

dale_coop

Moderator
Staff member
You can put your project .MST file anywhere... and move it anywhere after create. It doesn't matter.
For your Tilesets files (your assets):
- If you choose "Create Blank Tilesets" or "Create Default Tilsets", NESMaker makes a folder <ProjectName> in your "GraphicAssets" folder.
It uses "GraphicAssets\<ProjectName>" as your assets folder.
- If you choose "Use Existing Tilesets", it uses directly the "GraphicAssets" as your assets folder.

So if you always use "Create Blank Tilesets" or "Create Default Tilsets", you don't need to copy/paste the root folder. If fact, you don't need to copy/paste any folder. It's automatically separated.
If you use "Use Existing Tilesets", you can only use it once... else the second time, it will just reopen the same tilesets. So you might need to copy/paste de root folder or use the "Create Blank Tilesets" option when creating a new project.

As said Joe, the good practice might be to use "Create Blank Tilesets" or "Create Default Tilsets" for a better organization ;)


PS/ I have the same issue with colors after the Textbox disappeared
 

Retrobuster

New member
Anybody find a fix for the color changing issue? I tried resizing the text box and that didn't fix it for me either.
 

dale_coop

Moderator
Staff member
If you have a problem of color when the text box disappear, you need to change the size of your text box area. It IS currently the only « fix ».
 

MistSonata

Moderator
Dale is correct. Unfortunately the palettes not changing back is a product of the current textbox code, which doesn't properly restore the color information if the textbox isn't completely inside the 32x32 pixel sized attribute table.

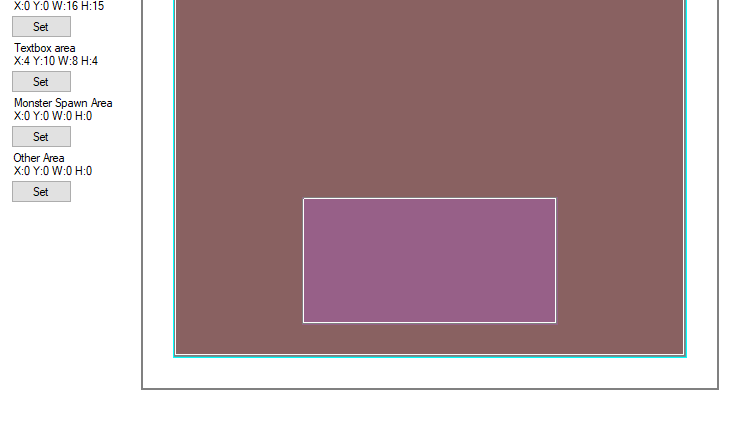
The long and short of it is that in order to prevent this from happening you need to make sure that all the numbers listed in textbox's size and position are even numbers.

Like this:
688ab917c5d21d5c964b766d9cb54f29.png


That way, it aligns with the attribute table grid.
 
Top Bottom